


Write your first smart contract using Remix IDE
In this article I will be showing you how to create your first ever smart contract in a super simple way! So, let’s get started...


What is REMIX?
Remix is a simple open source web IDE that you can use to write, debug, and deploy Ethereum smart contracts. Which makes it a great tool for learning to write smart contracts.
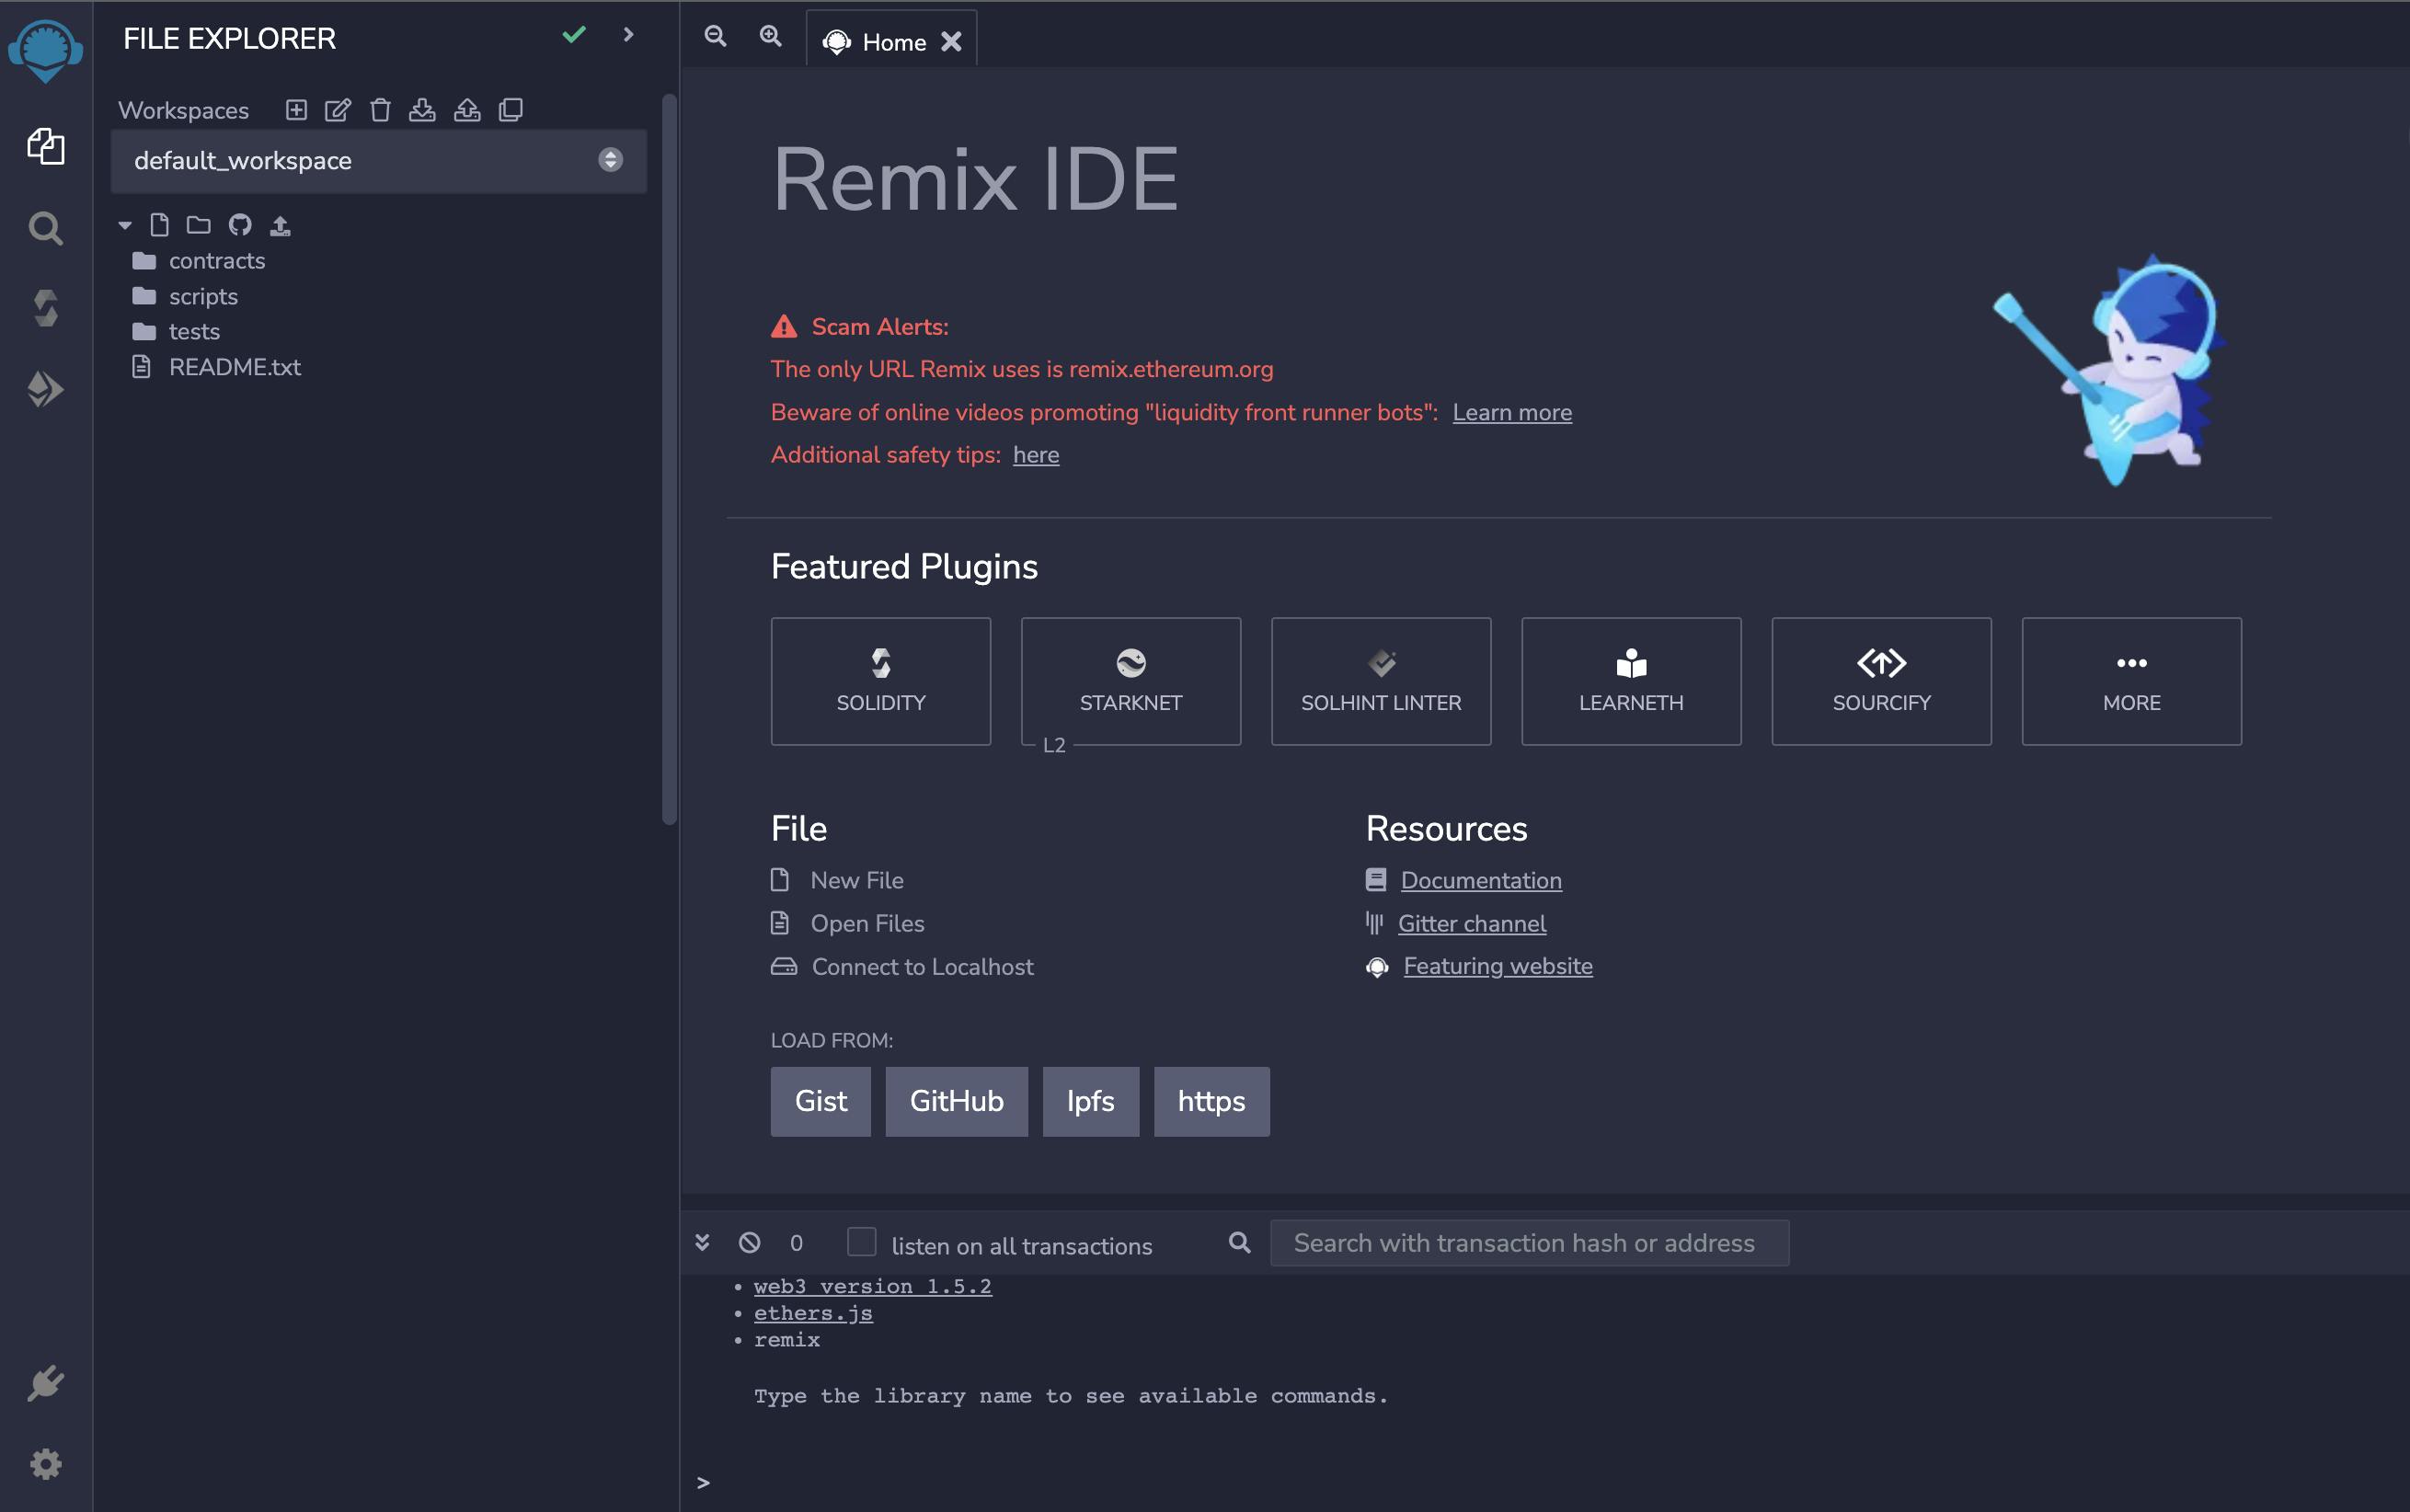
First, lets go to https://remix.ethereum.org/ this should pull up the IDE right in your browser. Should look like this:
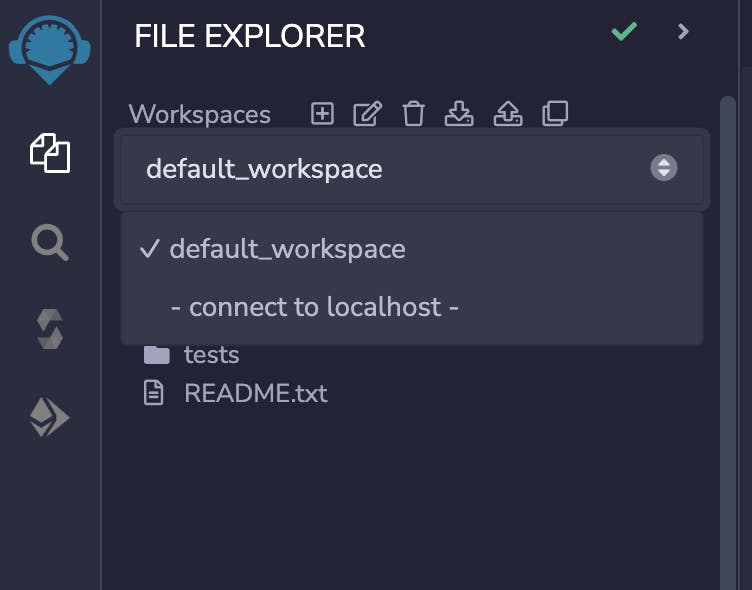
Next let's go to the left side and check that we have a workspace called default_workspace file under the file explorer.
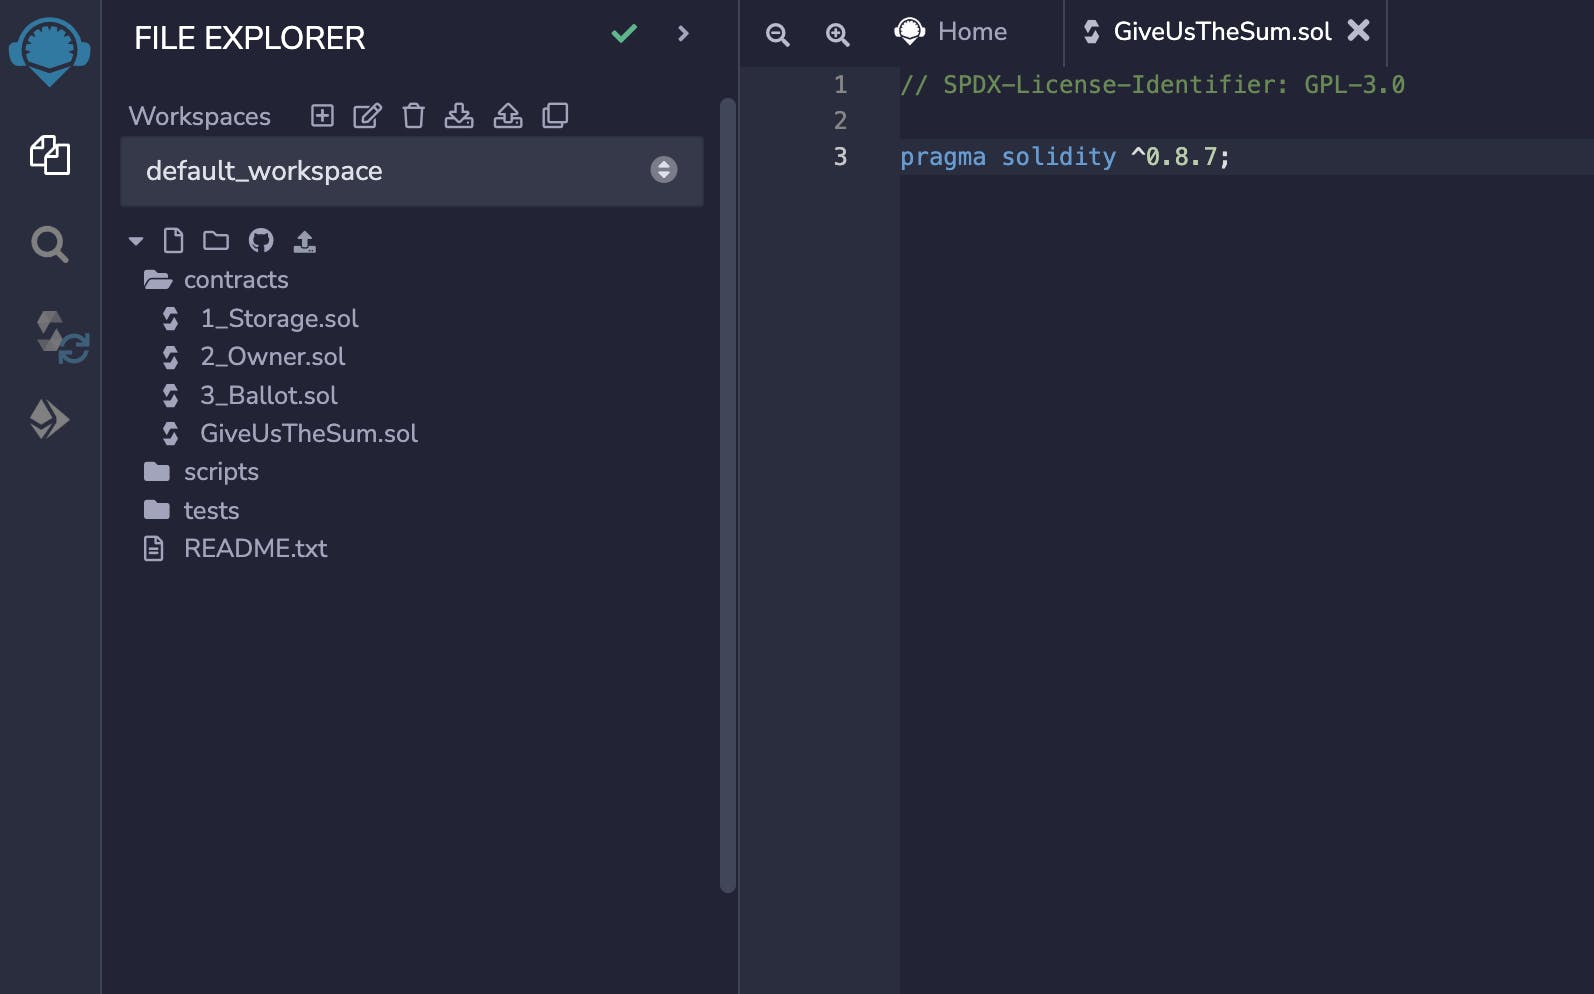
Let’s start coding! Under the default_workspace you will see an icon that looks like a page, click on it.
Create a new file in the contracts folder provided. Since we will be writing in Solidity we use .sol at the end of the name of our file.
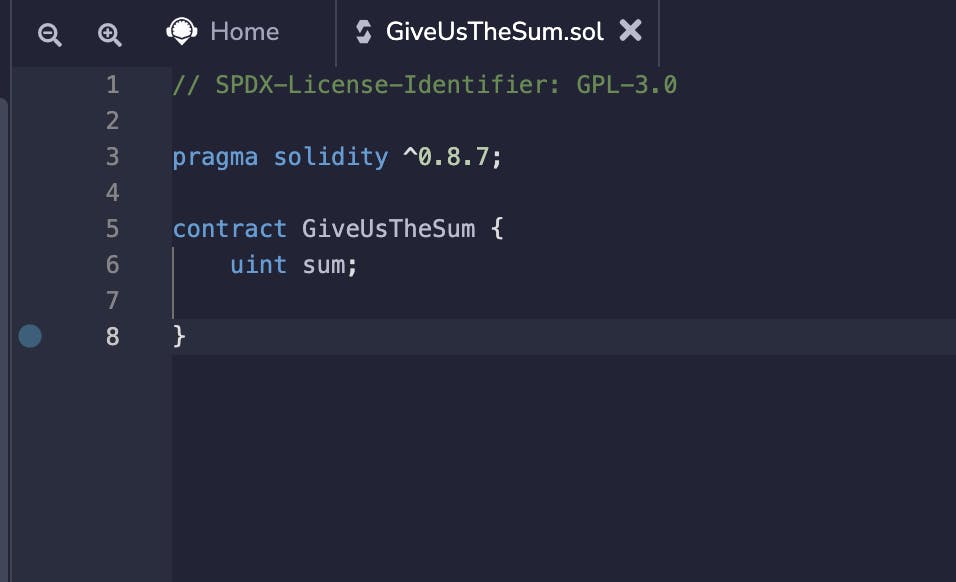
Let’s go ahead and name our contract file GiveUsTheSum.sol this way we can write a smart contract that will take in 2 numbers and return the sum to us.
Now that we created the new contract file we will go ahead and get started by adding the following:
Let's break it down. On line 1 we have added a license for open source software. This is the first thing you are going to need in any solidity program.
// SPDX-License-Identifier: GPL-3.0
Line 3, is stating the version of solidity compiler we want to use and it’s the first line of our smart contract.
Next we are going to define our contract as shown below.
If you are familiar with object oriented programming we can think of a contract similar to a class.
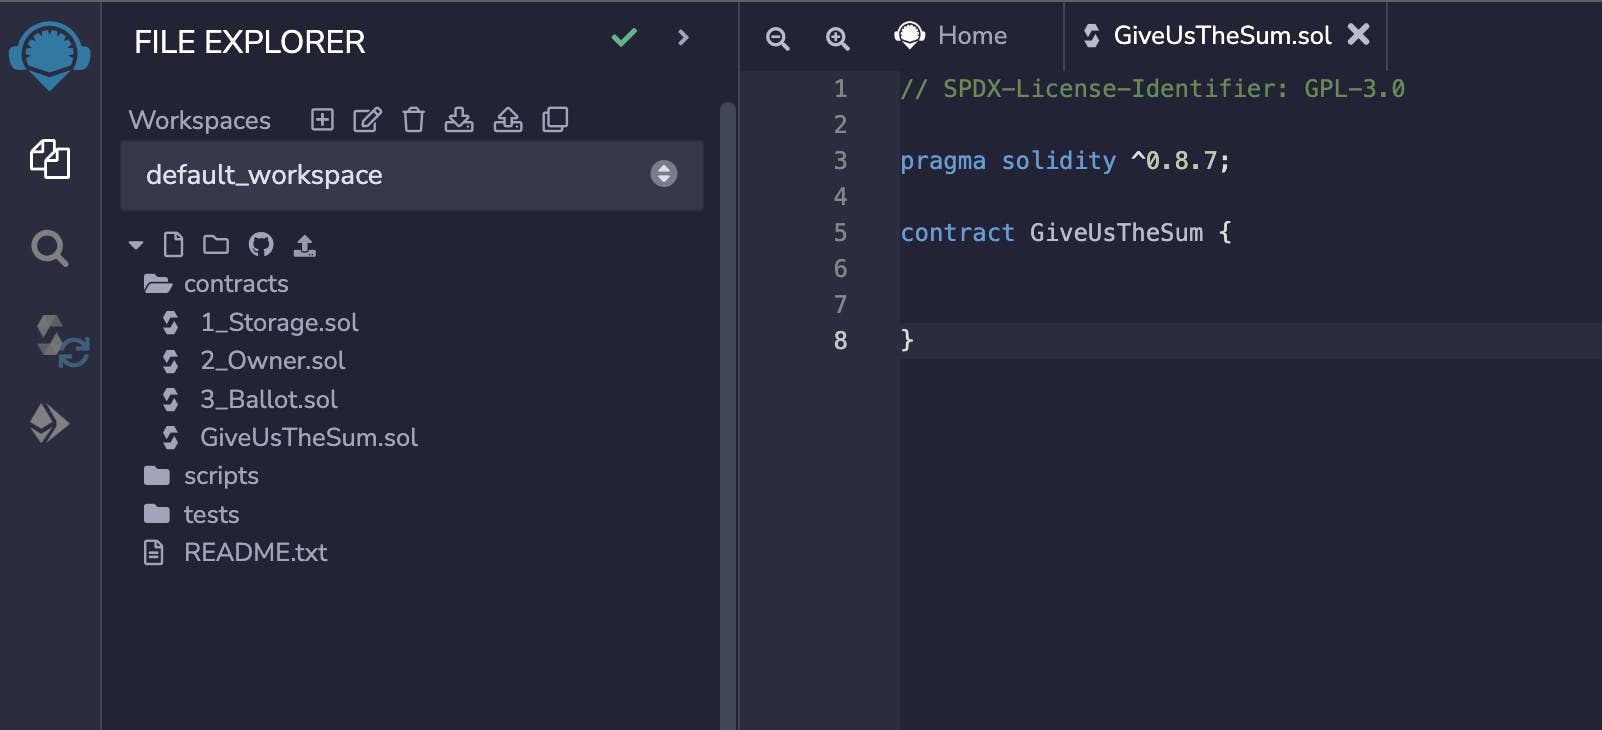
Contract is a key word in solidity. After we write contract we follow with the contract name which we decided was GiveUsTheSum followed by curly braces that will inclose and tell our program that whats inside these braces is the body of our contract.
Congrats 👏 you’ve set up your first contract this is AWESOME!! 🥳
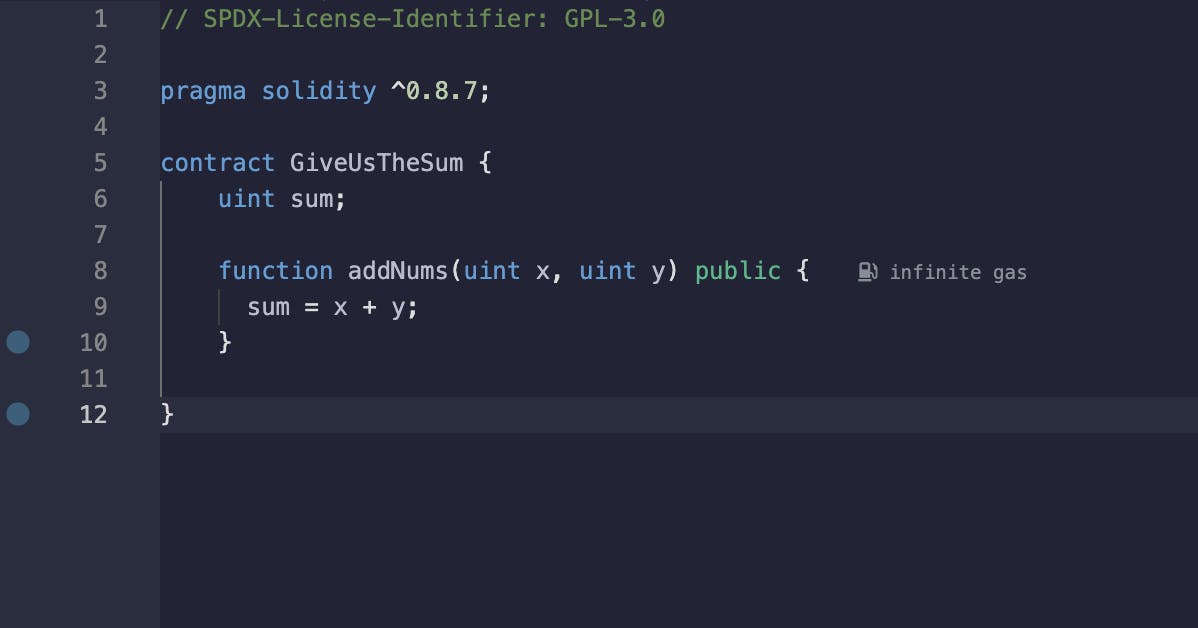
There are many types in solidity but for this contract we will be using uint and naming it sum like this uint sum;. Which is how we declare the type of an undefined integer which is not positive or negative. If you’d like to learn more about types check out the solidity docs here: https://docs.huihoo.com/ethereum/solidity/types.html
Let’s create our first function. Functions usually take in data, run it, and return something. You can think of it as a self contained module/ chunk of code that produces a task and is also reusable. Our function will be called addNums() and will take in two numbers (uint) x and y that will represent the numbers we will be adding.
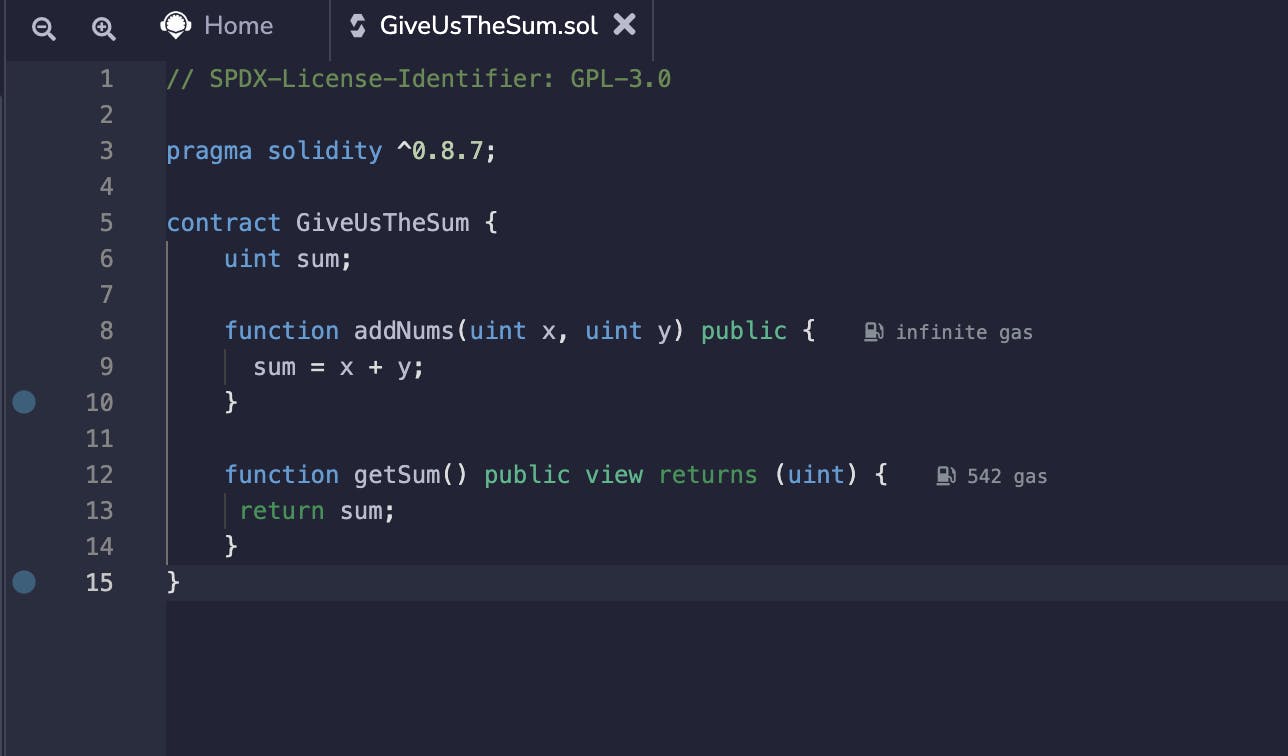
Next we will create a second function that will return the total amount of (uint) sum. We will call it getSum()
Side note: view is used for functions that don’t change the state of the contract and don’t require gas.
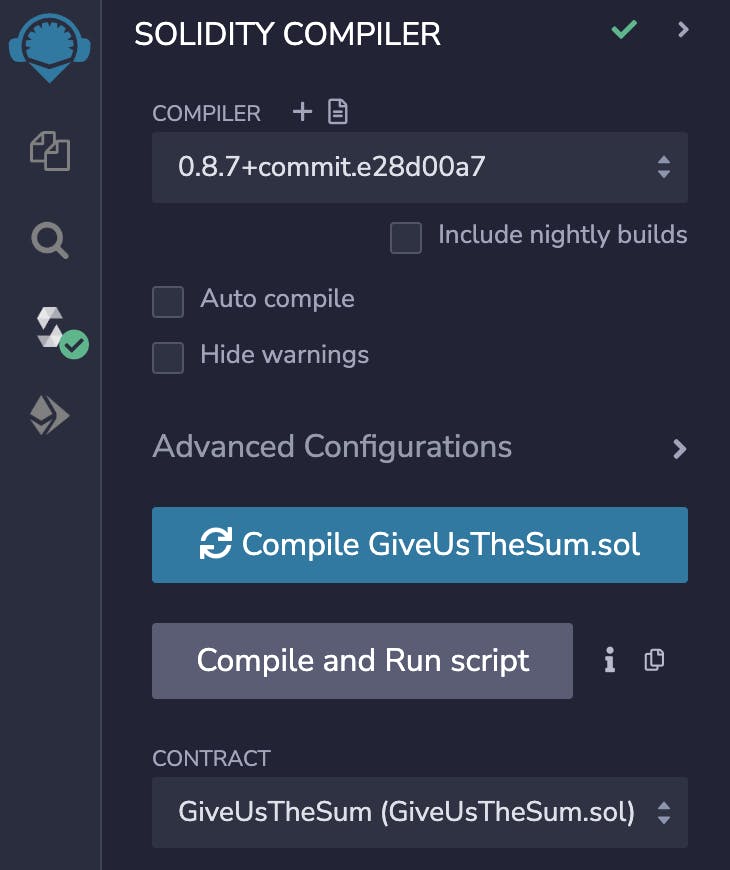
Now that we have both our functions we can try compiling our code by clicking on the 🔀 tab then clicking the blue “Compile GiveUsTheSum.sol” button or using command⌘ + S for mac or control + S on windows. If successfully compiled the 🔀 will show a green check ✅.
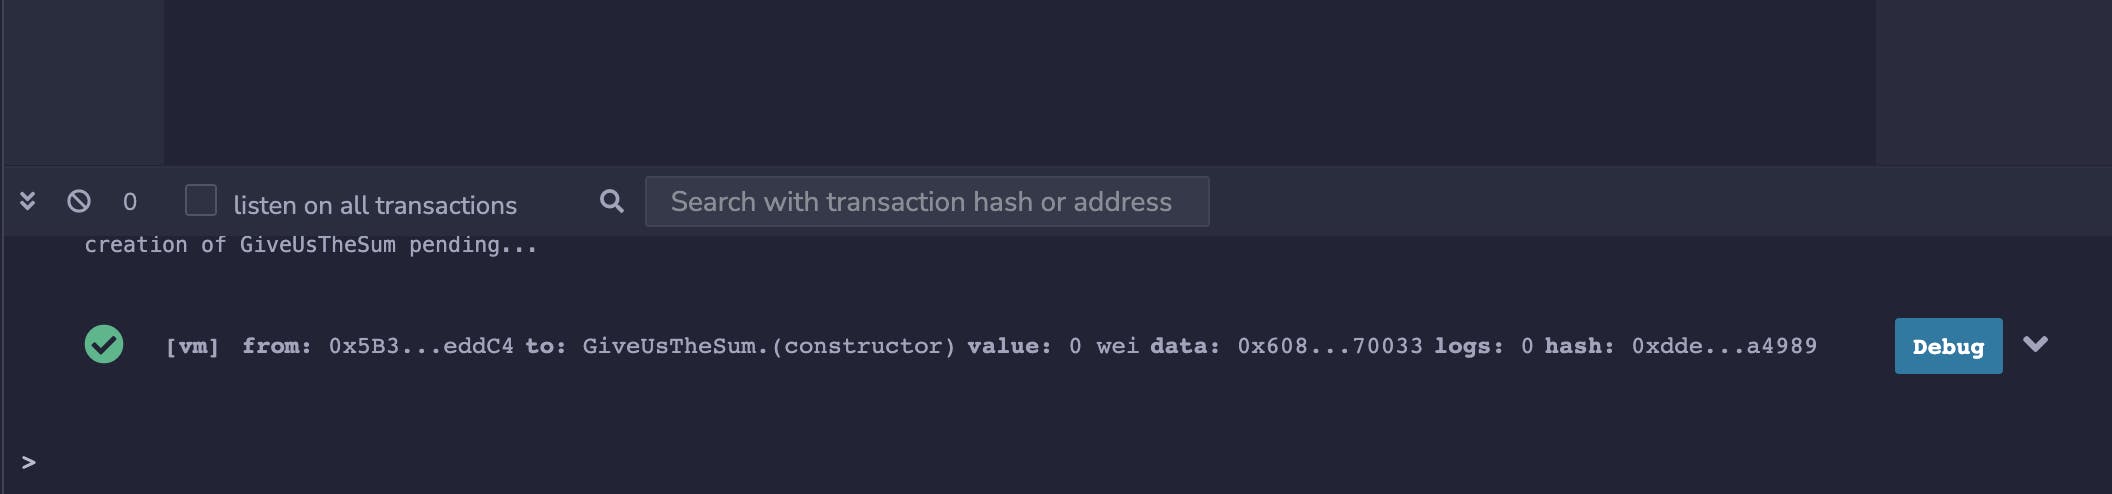
Now let’s deploying our contract by clicking on the deploy tab on the left side of our menu. This will give us a fake account with ethereum in it to interact with the Remix VM. Anytime we want to interact with a blockchain we have to pay some gas as it simulates below as well.
Click the orange Deploy button.
This will deploy your contract to a test network.
A test network is an instance of a blockchain used for testing without using real funds or polluting the main network with tests.

This section should pop up if successfully deployed and this basically means “cool you’ve deployed contract”. 🙌
All the way at the bottom of our deploy section we will see “Deployed Contracts” click on the tiny grey arrow to expand.
Should look like this:
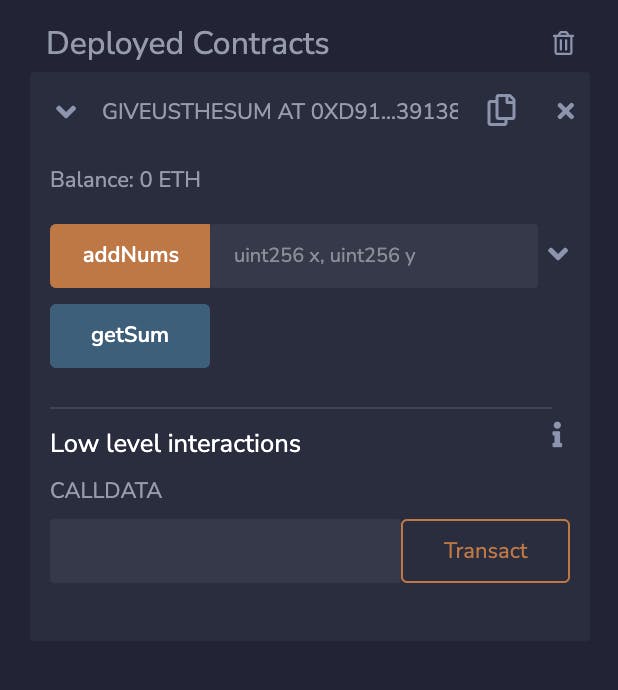
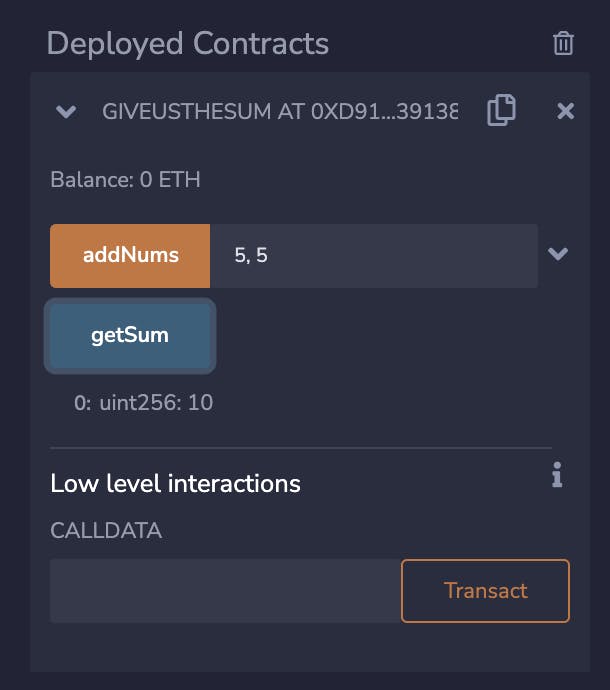
You will see a big “addNums” button which represents the addNums() function we wrote in our contract. In here we can type in the two numbers we would like to get the sum of.
As shown below I entered 5, 5 which represent the x and y variables we used in our addNums() function.
Click the orange button and it will complete a transaction and store these two numbers.
Click the blue getSum button.
It should return the total bellow.
Contracts thats it you’ve written, interacted with, and deployed your first smart contract! Hoorayyy! You freakin did it! 😃
Hope this article was useful.
If you have any questions or comments please drop them below👇
Let's connect! Twitter